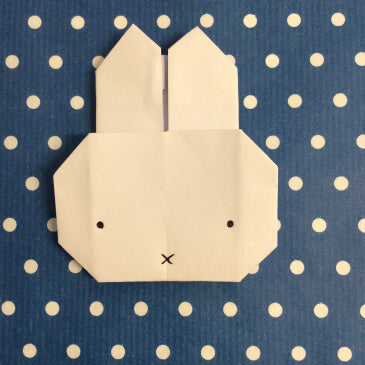
Origami Miffy is one of the cutest things you could ever make with a little bit of paper! Our easy to follow guide means you too can make your very own.
How To Make Your Very Own Origami Miffy
STEP 1
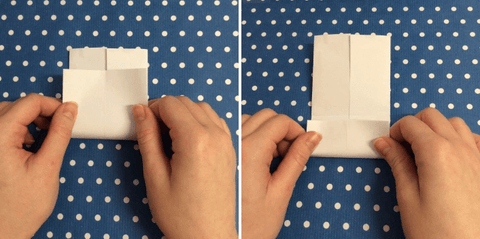
Start with a square piece of paper – we used 15cm X 15cm. Fold the paper in half (1). Then unfold the piece of paper and fold the top half and the bottom half to the creased centre line (2 & 3).

STEP 2
Turn your paper 90 degrees and fold in half (4). Then unfold it and fold the bottom half to the creased centre line (5).
STEP 3
Unfold the piece of paper. Gently slot your thumb in between the two layers (6) and create a triangle (7). Repeat this on the other side (8 & 9).
STEP 4
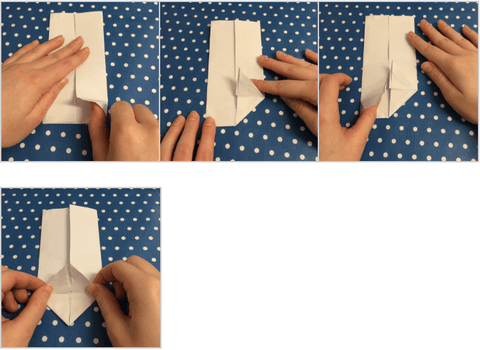
Turn your paper 180 degrees and make a fold which almost reaches the top crease (10). Turn your paper over and rotate 90 degrees, folding the bottom half up to the centre (11). Repeat with the top half (12).
STEP 5
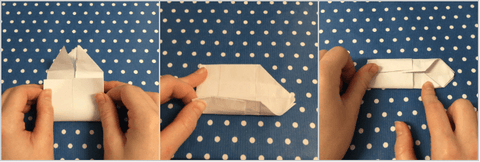
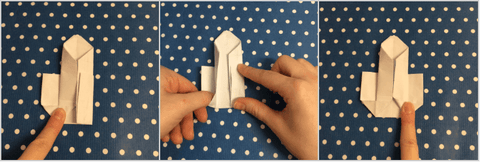
Turn 270 degrees, pop your finger in the space like photo 13. Then, push gently down to make a triangle, just like we did earlier (14). Do the same to the other side (15).
STEP 6
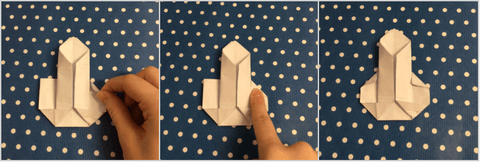
Take the right corner and make a little triangle (16) – push gently down so that it creases (17) and do the same to the other side (18).
STEP 7
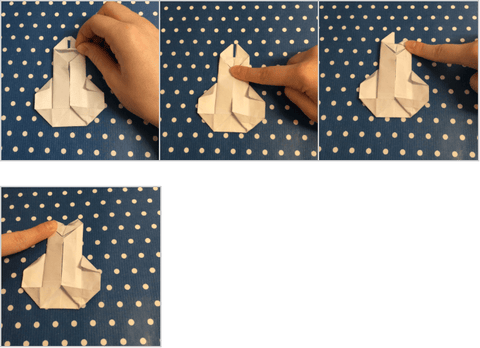
Take the very top triangle (19) and push down so that it creases (20). Then, take the ears and fold them so that they turn into tiny triangles (21) – do this to the other side (22).
STEP 8
Turn your paper over and draw your Miffy face!


